1.准备:
nginx-1.12.1.tar.gz
nginx_upstream_check_module-master.zip
放入/usr/local/script/nginx/目录下
2.安装所需要的依赖包
查看openssl版本是否符合需要:
yum list | grep openssl
1.0版本以上符合要求。
在安装openssl-devel时报错可考虑更换yum源或者安装rpm包。
yum install make cmake gcc gcc-c++ openssl openssl-devel libcrypto pcre pcre-devel patch -yuseradd nginx;
3.解压打补丁
cd /usr/local/script/nginx
tar xf nginx-1.12.1.tar.gz
unzip nginx_upstream_check_module-master.zip >/dev/null
cd nginx-1.12.1
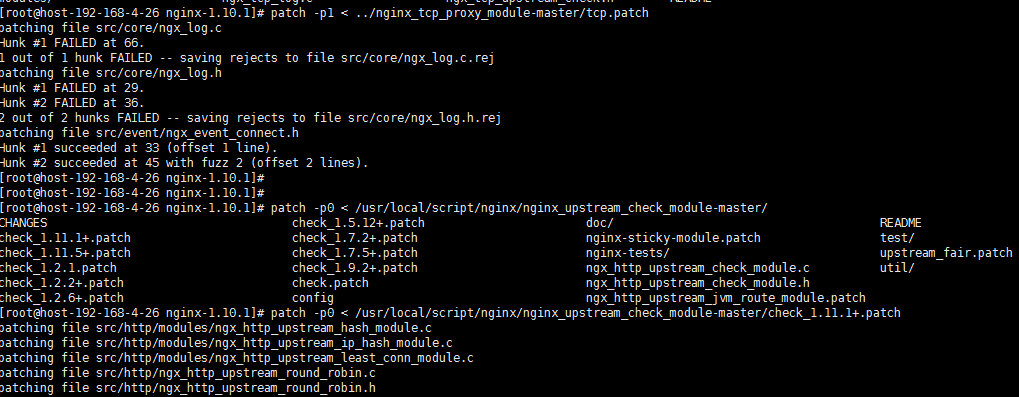
patch -p0 < /usr/local/script/nginx/nginx_upstream_check_module-master/check_1.12.1+.patch
4.编译安装
./configure  \
--prefix=/usr/local/nginx \
--user=nginx \
--group=nginx \
--sbin-path=/usr/sbin/nginx \
--conf-path=/usr/local/nginx/conf/nginx.conf \
--error-log-path=/usr/local/nginx/logs/error.log \
--http-log-path=/usr/local/nginx/logs/access.log \
--pid-path=/usr/local/nginx/nginx.pid \
--lock-path=/usr/local/nginx/nginx.lock \
--http-client-body-temp-path=/usr/local/nginx/client_temp \
--http-proxy-temp-path=/usr/local/nginx/proxy_temp \
--http-fastcgi-temp-path=/usr/local/nginx/fastcgi_temp \
--http-uwsgi-temp-path=/usr/local/nginx/uwsgi_temp \
--http-scgi-temp-path=/usr/local/nginx/scgi_temp \
--with-http_ssl_module \
--with-http_realip_module \
--with-http_addition_module \
--with-http_sub_module \
--with-http_dav_module \
--with-http_flv_module \
--with-http_mp4_module \
--with-http_gunzip_module \
--with-http_gzip_static_module \
--with-http_random_index_module \
--with-http_secure_link_module \
--with-http_stub_status_module \
--with-http_auth_request_module \
--with-mail --with-mail_ssl_module \
--with-ipv6 \
--with-stream \
--with-file-aio --with-cc-opt='-O2 -g -pipe -Wp,-D_FORTIFY_SOURCE=2 -fexceptions -fstack-protector --param=ssp-buffer-size=4 -m64 -mtune=generic' \
--add-module=/usr/local/script/nginx/nginx_upstream_check_module-master \
make && make install
nginx –V验证是否安装成功
创建所需要的文件夹:
mkdir -p /usr/local/nginx/logs
mkdir /var/cache/nginx
5.修改配置文件
cd /usr/local/nginx/conf
cp nginx.conf nginx.conf.bak
vim nginx.conf
user nginx nginx;
worker_processes  8;

#error_log  logs/error.log;
#error_log  logs/error.log  notice;
#error_log  logs/error.log  info;

#pid        logs/nginx.pid;
error_log  /var/log/nginx/error.log warn;
pid        /var/run/nginx.pid;
worker_rlimit_nofile 51200;

events {
    use epoll;
    worker_connections  51200;
}


http {
    include       mime.types;
    default_type  application/octet-stream;
    fastcgi_intercept_errors on;
    charset  utf-8;
    server_names_hash_bucket_size 128;
    client_header_timeout 60;
    client_body_timeout 30;
    send_timeout 60;
    client_header_buffer_size 128k;
    large_client_header_buffers 8 128k;
    client_max_body_size 128m;
    sendfile on;
    tcp_nopush     on;
    keepalive_timeout 60;
    tcp_nodelay on;
    client_body_buffer_size  512k;
    proxy_connect_timeout    5;
    proxy_read_timeout       60;
    proxy_send_timeout       5;
    proxy_buffer_size        16k;
    proxy_buffers            4 64k;
    proxy_busy_buffers_size 128k;
    proxy_temp_file_write_size 128k;
    gzip on;
    gzip_min_length  1k;
    gzip_buffers     4 16k;
    gzip_http_version 1.1;
    gzip_comp_level 2;
    #gzip_types       text/plain application/x-javascript text/css application/xml;
    gzip_types text/plain application/x-javascript text/css application/xml text/javascript application/x-httpd-php image/jpeg image/gif image/png;
    gzip_vary on;
    log_format  main '$remote_addr - $remote_user [$time_local] "$request" ' '$status $body_bytes_sent "$http_referer" ' '"$http_user_agent" "$http_x_forwarded_for" "$request_time"';

    #server_tokens off; #隐藏版本号
    access_log  /usr/local/nginx/logs/access.log main;
    include vhosts.conf;
    }
#启用TCP模块(注意不要放在http里面)
tcp {
      upstream mysql{
      server  192.168.4.24:3306 weight=1;
      }
      server {
             listen 3306;
             proxy_pass mysql;
      }
}
创建虚拟主机:
vim /usr/local/nginx/conf/vhosts.conf
upstream tomcat {
        server 192.168.4.26:8081;
        server 192.168.4.26:8082;
        server 192.168.4.26:8083;
        server 192.168.4.26:8084;
        check interval=3000 rise=2 fall=3 timeout=1000 type=http;
#       nginx后端健康检查配置,表示每3秒检测一次,请求2次正常标记为up,检测3次失败标记为down,超时时间为1秒,检测类型为http
        }


server {
        listen 80;
        server_name localhost;
        index index.jsp;
        root html;

        location / {
        proxy_next_upstream http_502 http_504 error timeout invalid_header;
        proxy_set_header Host $host;
        proxy_set_header X-Real-IP $remote_addr;
        proxy_set_header X-Forwarded-For $proxy_add_x_forwarded_for;
        proxy_pass http://tomcat;
        expires      3d;
   }

        location /nginx_status {
                check_status;
#               tcp_check_status;
                access_log      off;
auth_basic "nginx";
auth_basic_user_file passwd.db; ##目录认证
        }

   location ~ .*.(php|jsp|cgi|action|success)?$
   {
        proxy_set_header Host $host;
        proxy_set_header X-Real-IP $remote_addr;
        proxy_set_header X-Forwarded-For $proxy_add_x_forwarded_for;
        proxy_pass http://tomcat;
   }

   location ~ .*.(html|htm|gif|jpg|jpeg|bmp|png|ico|txt|js|css)$
   {
   root /usr/local/nginx;
   expires      30d;
   }

   access_log  /usr/local/nginx/logs/80_access.log main;
   error_log   /usr/local/nginx/logs/80_error.log  crit;
#    allow   192.168.123.0/24;
#    deny    all;
}

#启用后端健康检查模块
server {
        listen       81;
        server_name  localhost;

        location / {
            root   html;
            index  index.html index.htm;
        }

        location /nginx_status {
                check_status;
                access_log off;
        }
}
Nginx 某目录做认证:
printf "nginx:$(openssl passwd -crypt 123456)\n" >/usr/local/nginx/conf/passwd.db
auth_basic "nginx";
auth_basic_user_file passwd.db;
修改web根目录为/www/web/
    cd /usr/local/nginx/conf
    vim nginx.conf将
    location / {
        root   html;
                index  index.html index.htm;
        }
    改为
    location / {
            root   /www/web;
            index  index.html index.php index.htm;
        }
增加对index.php的识别:
    location ~ \.php$ {
            root           html;
            fastcgi_pass   127.0.0.1:9000;
            fastcgi_index  index.php;
            fastcgi_param  SCRIPT_FILENAME  $document_root$fastcgi_script_name;
            include        fastcgi_params;
        }
修改为:
        location ~ \.php$ {
            root           /www/web;
            fastcgi_pass   127.0.0.1:9000;
            fastcgi_index  index.php;
            fastcgi_param  SCRIPT_FILENAME  /scripts$fastcgi_script_name;
            #include        fastcgi_params;
            include fastcgi.conf;
       }
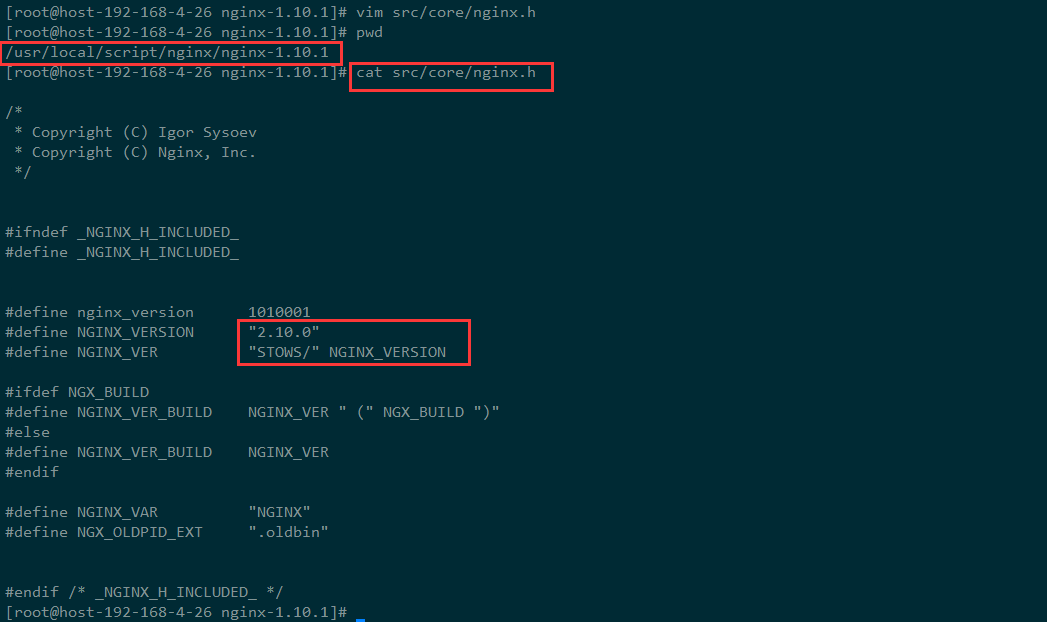
在编译之前可以修改nginx版本号:
vim /usr/local/nginx/script/nginx-1.12.1/src/core/nginx.h
修改如下部分:
所有后端应用服务器首页路径指向nginx的IP不要加端口,数据库连接也指向nginx服务器IP。

?议论文评语?
建议引入反面案例,增强辩证性。
文化底蕴深厚,引经据典信手拈来。
字里行间流露出真挚的情感,让人感同身受,共鸣不已。
这篇文章如同一幅色彩斑斓的画卷,每一笔都充满了独特的创意。